
The Honeywell T6 Pro Thermostat is a programmable, energy-efficient solution designed for easy installation and seamless integration with home heating and cooling systems. T6 Pro features advanced temperature control, a UWP mounting system, and an optional decorative cover plate for a sleek appearance. With its learning capabilities, it adapts to your schedule, optimizing comfort and energy savings.
Overview of Features and Benefits
The Honeywell T6 Pro Thermostat offers advanced temperature control with a user-friendly interface. It features a UWP mounting system for easy installation, optional decorative cover plate, and compatibility with various heating and cooling systems. The thermostat learns your schedule to optimize energy use and comfort. It supports Wi-Fi connectivity for remote control via the Honeywell Home app and is designed for energy efficiency, ensuring cost savings while maintaining your desired home climate.
Pre-Installation Steps
Before installing the Honeywell T6 Pro Thermostat, check system compatibility and gather all necessary tools and materials, ensuring a smooth and efficient installation process.
Checking System Compatibility
Before proceeding with installation, ensure the Honeywell T6 Pro Thermostat is compatible with your heating and cooling system. Verify that it supports your system type, such as forced air, heat pump, or hydronic systems. Check the wiring diagram in the manual to confirm compatibility with your existing setup. Additionally, ensure the thermostat is compatible with your system’s voltage requirements to avoid installation issues. Always refer to the user manual for specific compatibility details.
Gathering Necessary Tools and Materials
Before starting the installation, gather all required tools and materials. You will need a screwdriver, drill, leveling tool, and wall anchors. Ensure you have the Honeywell T6 Pro Thermostat package contents, including the UWP mounting system, decorative cover plate, screws, and 2 AA batteries. Check the package for any additional materials, such as red wall anchors for drywall. Having everything ready will streamline the installation process.
UWP Mounting System Installation
The UWP Mounting System installation begins with opening the package and positioning the UWP on the wall. Ensure it is level, mark the hole positions, and drill accordingly. Secure the wall anchors and attach the UWP using the provided screws. This step ensures a stable and proper installation of the Honeywell T6 Pro Thermostat.
Positioning and Leveling the UWP
Proper positioning and leveling of the UWP are crucial for accurate installation. The UWP Mounting System is designed for easy setup. Hold it against the wall, ensuring it’s straight. Use a level to confirm alignment and mark the hole positions accurately. Double-check the level before drilling to avoid installation issues. This ensures the Honeywell T6 Pro Thermostat is securely and correctly mounted for optimal performance and efficiency.
Drilling Holes and Securing Wall Anchors
Drill holes at the marked positions using a 7/32-inch drill bit for drywall. For red wall anchors, drill 7/32-inch (5.6 mm) holes. Gently tap the supplied wall anchors into place with a hammer. Ensure the anchors are seated firmly to provide a stable base for the UWP Mounting System. This step is essential for securing the thermostat and preventing any movement or misalignment during operation.
Wiring the Honeywell T6 Pro Thermostat
Wiring involves connecting input control signal wires to appropriate terminals, ensuring correct configuration for heating, cooling, and power. Proper connections are crucial for safe operation.
Connecting Wires to Terminal Designations
Connect input control signal wires to the appropriate terminals, ensuring compatibility with your heating, cooling, or heat pump system. Reference the manual for specific terminal designations to avoid errors. Proper wire connections are essential for safe and efficient thermostat operation, ensuring accurate temperature control and system functionality. Always double-check wiring before powering the system to prevent potential damage or safety hazards.
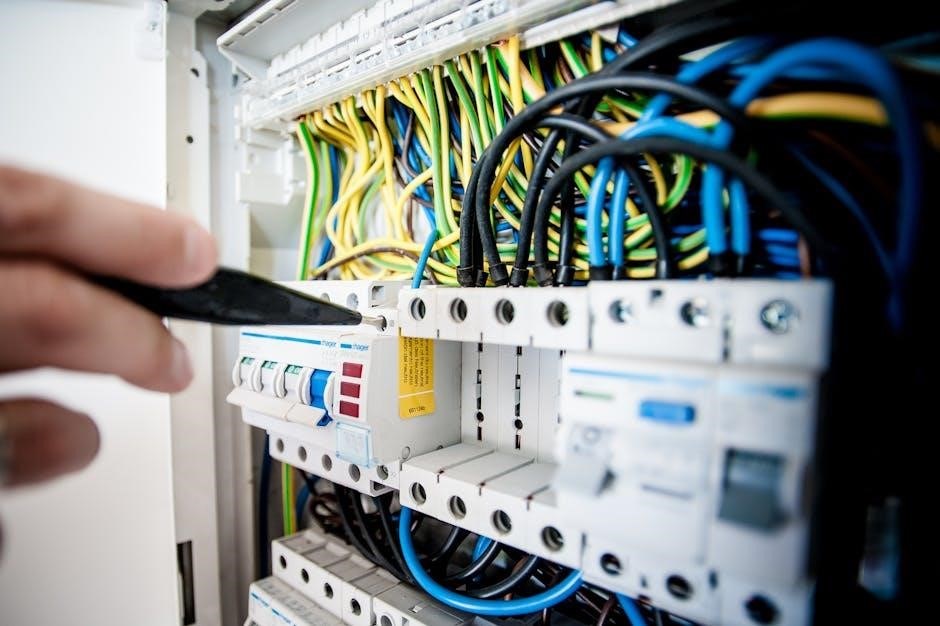
Ensuring Proper Wire Connections and Safety
Always turn off power to the HVAC system at the circuit breaker before connecting wires. Use a voltage tester to confirm no power is present. Double-check all wire connections to ensure they match the terminal designations in the manual. Proper connections prevent overheating, system malfunctions, or safety hazards. If unsure, consult a licensed professional to ensure safe and correct installation.
Power Options and Battery Installation
The Honeywell T6 Pro Thermostat offers flexible power options, including battery-powered or hardwired configurations. For battery installation, insert 2 AA batteries to ensure reliable operation and backup power.
Choosing Between Battery-Powered or Hardwired Options
The Honeywell T6 Pro Thermostat offers flexibility with two power options: battery-powered or hardwired. Battery power provides convenience and backup during outages, using 2 AA batteries. Hardwiring ensures a constant power supply without battery replacements, ideal for permanent installations. Choose the option that best suits your home’s electrical setup and personal preference for reliable performance and energy efficiency.
Installing 2 AA Batteries for Power
Installing 2 AA batteries in the Honeywell T6 Pro Thermostat is straightforward. Locate the battery compartment, usually at the back or bottom. Insert the batteries ensuring correct polarity (+ and ⏤ signs align). This provides reliable power without hardwiring. Use high-quality batteries for optimal performance. The thermostat will operate seamlessly, offering energy efficiency and convenience for your home’s temperature control.
Optional Cover Plate Installation
The optional cover plate enhances the thermostat’s appearance and covers gaps from previous installations. It mounts effortlessly, providing a sleek, uniform look for your home’s interior.
When to Use the Optional Cover Plate
Use the optional cover plate to enhance the thermostat’s appearance or cover gaps from previous installations. It is ideal for mounting the thermostat on an electrical junction box or when a decorative finish is desired. The cover plate provides a seamless look and ensures a professional installation, especially in cases where the old thermostat left visible paint gaps or uneven surfaces.
Mounting the Cover Plate for Aesthetic Appeal
To mount the cover plate for a polished look, align it with the UWP mounting system and secure it using the provided screws. Ensure the plate is level and evenly spaced for a professional finish. This adds a decorative touch, complementing your home’s interior while concealing any gaps from previous installations. The cover plate enhances the thermostat’s appearance, blending seamlessly with its surroundings.

Programming and Setting Up the Thermostat
Configure temperature schedules and preferences using the intuitive interface or Honeywell Home app. Program custom settings to optimize energy usage and comfort based on your daily routine.
Setting Up the Initial Configuration
Start by powering on the thermostat and navigating through the menu. Set the date, time, and temperature units (°F or °C). Choose your system type (Heat, Cool, or Heat Pump) and configure basic operating modes. Use the Honeywell Home app for remote setup. Test the display and ensure all buttons respond correctly before proceeding to advanced settings.
Configuring Temperature Schedules and Holds
Set custom temperature schedules to match your daily routine. Use the hold feature to override the schedule temporarily or permanently. Permanent Hold locks the temperature until manually changed, while Temporary Hold reverts after a set period. Program up to six temperature changes per day for optimal comfort and energy efficiency. Use the Honeywell Home app for remote adjustments and scheduling convenience.

Final Checks and Testing
After installation, ensure the Honeywell T6 Pro Thermostat operates correctly by testing heating, cooling, and all programmed settings. Verify the display and ensure the device is level for accurate temperature control.
Verifying Thermostat Operation
After installation, ensure the Honeywell T6 Pro Thermostat operates correctly by testing basic functions. Turn the system on and off, check the display for proper response, and verify temperature adjustments. Confirm the thermostat accurately follows programmed schedules and maintains consistent temperatures. Ensure the system starts heating or cooling at the correct times. Verify all buttons and controls function as expected for smooth operation.
Testing Heating and Cooling Systems
After installation, test the heating and cooling systems to ensure proper operation. Switch the thermostat to heating mode and verify the system activates. Repeat the process for cooling mode. Check the display for accurate temperature readings and ensure the system responds to adjustments. Confirm smooth transitions between modes and monitor for consistent heating or cooling performance. This ensures the thermostat controls your HVAC system effectively.
Troubleshooting Common Issues
The Honeywell T6 Pro may encounter common issues like wiring problems or display malfunctions. Check connections, ensure proper power supply, and restart the thermostat if necessary.
Resolving Wiring or Connection Problems
Wiring issues can prevent the Honeywell T6 Pro from functioning correctly. Ensure all wires are securely connected to the appropriate terminals, matching the wiring diagram. Verify that the R, W, Y, and G wires are correctly assigned. Check for loose connections or short circuits, which can cause malfunctions. If using a C-wire, confirm it’s properly connected for continuous power. Turn off the power at the circuit breaker before inspecting or adjusting wires to avoid electrical hazards. If problems persist, consult the user manual or contact a licensed electrician for assistance.
Addressing Display or Communication Issues
If the Honeywell T6 Pro display is blank or unresponsive, check the power source and ensure batteries are installed correctly. For communication issues with Wi-Fi or smart home systems, restart the router and ensure the thermostat is connected to the correct network. If problems persist, update the firmware or perform a factory reset. Consult the user manual or contact support for further assistance.
The Honeywell T6 Pro Thermostat installation process is straightforward with proper preparation and tools. For additional support, refer to the official Honeywell website, user manuals, or contact customer service for assistance. Ensure optimal performance by following guidelines and updating firmware regularly.
Summarizing the Installation Process
The Honeywell T6 Pro Thermostat installation involves pre-installation checks, UWP mounting system setup, wiring connections, and power configuration. Start by ensuring system compatibility and gathering tools. Mount the UWP, drill holes, and secure wall anchors. Connect wires to terminals, ensuring safety and proper connections. Choose between battery or hardwired power and install batteries if needed. Test the thermostat and heating/cooling systems to confirm functionality. Refer to the manual for detailed guidance.
Referencing Additional Support and Guides
For comprehensive support, refer to the official Honeywell Home website, which offers detailed installation manuals, troubleshooting guides, and user FAQs. Additional resources include the Honeywell T6 Pro User Guide and Lyric T6 Pro Installation Manual. These guides provide step-by-step instructions, wiring diagrams, and solutions for common issues, ensuring a smooth setup and operation of your thermostat.