
The Redemptor Dreadnought is a formidable unit in Warhammer 40k, combining resilience with devastating firepower. Its design reflects the blending of advanced technology and religious symbolism, embodying the unyielding spirit of the Space Marines. As a walking arsenal, it plays a pivotal role on the battlefield, offering both offensive and defensive capabilities. This section provides an overview of its significance and role within the Warhammer 40k universe.
1.1 Overview of the Redemptor Dreadnought in Warhammer 40k
The Redemptor Dreadnought is a versatile and powerful unit in the Warhammer 40k universe, serving as a walking arsenal for the Space Marines. Its design combines resilience with devastating firepower, making it a key asset on the battlefield. Equipped with advanced weaponry and robust armor, the Redemptor excels in both close combat and ranged engagements. Players often utilize it as a multi-role unit, capable of providing suppressive fire or engaging enemy vehicles. Its durability allows it to withstand significant damage, making it a reliable choice for both offensive and defensive strategies. The Redemptor’s popularity stems from its balance of utility and firepower, appealing to both competitive players and hobbyists who enjoy its intricate design and customization options.

1.2 Historical Context and Lore
The Redemptor Dreadnought is a relatively modern addition to the Space Marines’ arsenal, introduced in the aftermath of the Horus Heresy to honor the fallen and preserve their consciousness. Its design reflects the Imperium’s commitment to resilience and redemption, serving as a walking shrine to the Emperor and the indomitable spirit of the Adeptus Astartes. The Redemptor is often seen as a symbol of defiance, embodying the unyielding will to fight against overwhelming odds. Its name, “Redemptor,” signifies its role as a instrument of redemption, both for the fallen Marine it carries and the battles it fights. This lore deeply ties the Redemptor to the grimdark narrative of Warhammer 40k, where sacrifice and duty are paramount.

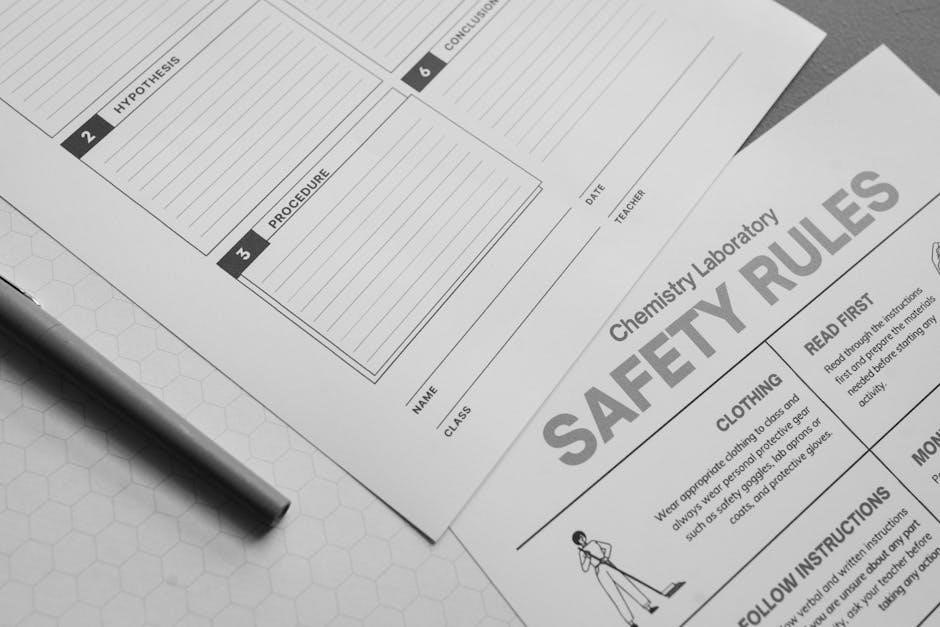
Assembly and Instructions
The Redemptor Dreadnought’s assembly requires precision and care, with intricate parts demanding attention to detail. Proper alignment and instruction following are crucial for optimal functionality.
2.1 Common Errors in the Redemptor Dreadnought Instructions
One of the most frequently encountered issues during assembly is the misidentification of parts, particularly pieces 2a and 8a, which both require piece 74 but are not interchangeable. Many builders also struggle with aligning the dreadnought’s arm components correctly, leading to mobility issues in the finished model. Additionally, the instructions often fail to clarify the proper orientation of the missile pod and plasma cannon, causing confusion among hobbyists. Another common mistake is not ensuring the torso and leg sections are properly aligned before gluing, which can result in a crooked or unstable model. Double-checking each step and using a dry-fit method before applying adhesive is highly recommended to avoid these pitfalls.
2.2 Step-by-Step Assembly Guide
Begin by carefully preparing all components from the sprue, ensuring no residue remains. Start with the lower body assembly, attaching the legs and hip joints securely. Pay close attention to the alignment, as misalignment can affect the model’s stability. Next, assemble the torso section, attaching the chest plate and ensuring proper fitment with the lower body. When attaching the arms, make sure the weapon systems are aligned correctly, especially the missile pod and plasma cannon. Use a dry-fit method to test the placement before gluing. Finally, attach the head and any additional wargear, such as the frag launcher or smoke launchers. Double-check all connections and ensure no parts are left loose. A well-assembled Redemptor Dreadnought will be both durable and visually impressive.

Optimal Loadouts and Upgrades
The Redemptor Dreadnought excels with versatile loadouts, including missile pods for long-range engagements and plasma cannons for high-damage output. Upgrading with heavy weaponry enhances its battlefield versatility.

3.1 Popular Weapon Configurations

The Redemptor Dreadnought’s versatility shines through its weapon configurations, allowing players to adapt to various battlefield scenarios. One popular setup includes pairing the heavy plasma cannon with missile pods, offering both high-damage potential and flexibility against different targets. Another favored configuration is the multi-melta combined with heavy flamer, excelling in close-quarters combat and anti-tank roles. For anti-infantry focused builds, the heavy bolter and auto-launcher provide consistent and reliable firepower. These configurations are often enhanced with upgrades like Auguriums or Exemplar of the Promethean Cult, boosting accuracy and damage output. Players can tailor their loadouts to suit their playstyle, ensuring the Redemptor remains a formidable presence on the battlefield.
3.2 Wargear and Enhancement Options
The Redemptor Dreadnought can be equipped with various wargear to enhance its combat effectiveness. Popular options include the Augurium, which improves targeting accuracy, and the Exemplar of the Promethean Cult, granting bonus attacks in close combat. Players often opt for reinforced armor to increase durability, while advanced tracking systems enhance its ability to engage moving targets. Additionally, the Redemptor Sacred Mantle provides a 4+ invulnerable save, making it more resistant to heavy firepower. These enhancements allow players to tailor the Dreadnought to their preferred playstyle, whether focusing on ranged devastation or close-quarters dominance. By combining the right wargear, the Redemptor becomes a highly adaptable and formidable unit on the battlefield.
Tactical Deployment Strategies
Position the Redemptor Dreadnought near high-value targets to maximize its protective capabilities. Use its firepower to clear clusters of enemies while supporting frontline units effectively in combat zones.
4.1 Battlefield Role and Positioning
The Redemptor Dreadnought excels as a versatile combat unit, capable of fulfilling multiple roles on the battlefield. Its primary function is to provide heavy firepower while protecting nearby allies; Positioning it near objectives or high-value units ensures optimal coverage and defensive support. The Redemptor’s durability allows it to withstand significant damage, making it an excellent anchor point for advancing forces. Deploying it in cover enhances its survivability, enabling it to unleash its weapons effectively. Additionally, its presence can deter enemy movements, creating strategic advantages. Proper positioning maximizes its impact, ensuring it remains a formidable presence throughout the battle. Effective use of the Redemptor can turn the tide in favor of your army.
4.2 Synergy with Other Units
The Redemptor Dreadnought shines when paired with complementary units, enhancing its battlefield impact. Pairing it with Intercessors or Heavy Intercessors provides a balanced mix of ranged and melee capabilities, allowing the Redemptor to focus on heavy firepower while the infantry handles close combat. Inceptors and Eliminators can offer rapid, agile support, clearing enemy threats that might otherwise overwhelm the Dreadnought. Additionally, Repulsor Executioners or Impulsor units can amplify its mobility and offensive potential. Synergy with Primaris Psykers or Chaplains further enhances its survivability and combat effectiveness. By integrating the Redemptor into a cohesive army list, players can maximize its versatility and create a formidable battlefield presence. Proper unit coordination ensures the Redemptor Dreadnought remains a cornerstone of any tactical strategy.

Community Feedback and FAQs
Players often discuss optimal loadouts and assembly tips for the Redemptor Dreadnought. Common questions include weapon configurations and troubleshooting instructions. The community praise its durability and firepower, but some note high costs.
5.1 Common Questions and Solutions

Players frequently ask about optimal loadouts and troubleshooting assembly errors for the Redemptor Dreadnought. A common issue is misidentifying parts during assembly, which can be resolved by cross-referencing the instruction manual carefully. Many inquire about the best weapon configurations, with the heavy flamer and multi-melta being popular choices for close-range combat. Additionally, users often seek advice on balancing cost and effectiveness, as the Redemptor can be expensive. The community recommends focusing on its role as a versatile firepower unit rather than expecting it to handle multiple battlefield tasks. Ensuring proper positioning and synergy with other units is also a recurring topic for maximizing its impact.
5.2 Player Experiences and Tips

Players often highlight the Redemptor Dreadnought’s versatility but caution against overloading it with upgrades. Many recommend starting with a balanced loadout, such as the heavy flamer and multi-melta, for reliable performance. Assembly can be tricky, with part misidentification being a common issue— players suggest double-checking instructions to avoid errors. On the battlefield, positioning near other units enhances its survivability and impact. Veterans advise using its ranged capabilities before closing in, as its durability shines in mid-range combat. Additionally, leveraging its aura abilities to support nearby troops can significantly boost army performance. Overall, the Redemptor excels as a flexible, hard-hitting unit when used strategically.