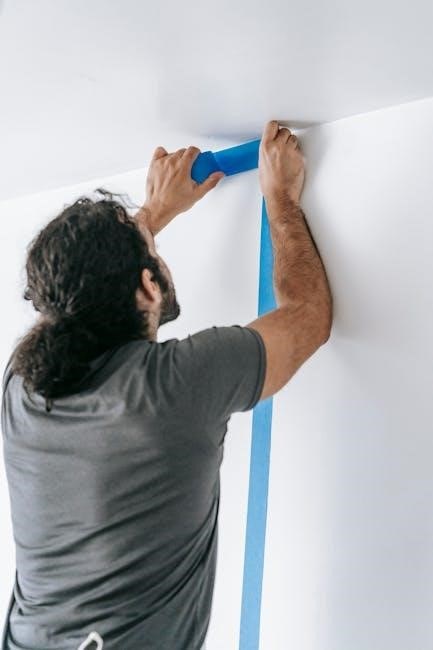
Leveling your yard is essential for a professional sod installation‚ ensuring proper drainage‚ root growth‚ and a visually appealing lawn. It involves creating a smooth‚ even surface‚ typically 1 inch below paved areas‚ using tools like shovels‚ rakes‚ and levels. Proper sod leveling guarantees optimal sod adhesion‚ prevents water pooling‚ and promotes healthy grass growth. It’s a meticulous process requiring attention to detail to achieve the desired results and a lush‚ uniform lawn appearance.
Understanding the Importance of a Level Surface for Sod Installation
A level surface is crucial for successful sod installation‚ as it ensures proper drainage‚ prevents water pooling‚ and promotes healthy root growth. Uneven ground can lead to water accumulation‚ which may kill the grass and create bare spots. Additionally‚ a level surface guarantees even sod adhesion‚ reducing the risk of gaps or unevenness. Proper leveling also enhances the visual appeal of the lawn‚ creating a uniform and professional appearance. Furthermore‚ it prevents soil settling issues that could arise after installation. By achieving a smooth‚ even base‚ you ensure the sod establishes itself effectively‚ leading to a lush‚ durable‚ and long-lasting lawn. Proper preparation is key to achieving these benefits.

Tools and Equipment Needed for Sod Levelling
- Essential tools include a shovel‚ rake‚ level‚ and rolling tools.
- Additional equipment like a wheelbarrow‚ soil probe‚ and 2×4 board may also be necessary.
Essential Tools: Shovel‚ Rake‚ Level‚ and Rolling Tools
A shovel is crucial for digging and moving soil to fill low spots or remove excess material. A rake helps smooth the soil surface‚ ensuring evenness and proper preparation. A level tool is vital for checking and achieving a uniform grade‚ especially around paved areas. Rolling tools‚ such as a lawn roller or hand tamper‚ compact the soil to create a stable base for sod installation. These tools work together to ensure the ground is properly prepared‚ leveled‚ and compacted‚ which is essential for successful sod growth and a visually appealing lawn. Proper use of these tools guarantees a professional-grade sod installation.

Preparing the Soil for Sod
Preparing the soil involves loosening compacted areas‚ filling dips with topsoil‚ and ensuring a smooth‚ even surface. This step is crucial for proper drainage and root growth.
Testing the Soil pH and Nutrient Levels
Testing the soil pH and nutrient levels is a critical step in preparing for sod installation. Use a soil testing kit to determine the pH level‚ ensuring it falls within the ideal range for sod growth‚ typically between 6.0 and 7.0. If the pH is too low or high‚ amend the soil with lime or sulfur as needed. Additionally‚ check nutrient levels and add organic matter or fertilizers to create a balanced soil environment; Proper soil preparation ensures healthy root development and promotes vigorous grass growth. This step guarantees the sod will have the necessary conditions to thrive‚ leading to a lush‚ uniform lawn.
Reducing Compacted Soil and Adding Organic Matter
Compacted soil can hinder root growth and water penetration‚ making it essential to loosen the ground before sod installation. Use tools like a fork or aerator to break up compacted areas‚ ensuring proper drainage and air circulation. Incorporating organic matter‚ such as compost or peat moss‚ improves soil structure‚ enhances nutrient availability‚ and promotes healthy microbial activity. Spread a 2- to 3-inch layer of organic material evenly across the soil‚ then mix it in using a rake or tiller. This step creates a fertile‚ well-draining base for sod‚ ensuring strong root establishment and a lush‚ resilient lawn. Proper soil preparation is key to long-term sod success.
Addressing Uneven Areas
Identify uneven spots and fill dips with topsoil‚ ensuring the surface is smooth and level. This prevents water buildup and promotes even sod growth.
Filling in Dips and Low Spots with Topsoil
Filling dips and low spots with topsoil is crucial for creating an even surface for sod installation. Identify these areas and spread topsoil evenly‚ raking it smooth. Use a level to ensure the filled areas align with the surrounding soil. Properly filled dips prevent water pooling‚ which can damage the sod and lead to uneven growth. After filling‚ compact the soil gently to avoid settling issues. This step ensures the sod lies flat and adheres well to the ground‚ promoting healthy root development and a uniform lawn appearance. Regularly check and adjust filled areas before laying the sod for optimal results.
Smoothing the Soil Surface for a Uniform Base
Smoothing the soil surface ensures a uniform base for sod installation‚ promoting even growth and stability. After filling dips‚ use a rake or leveling tool to distribute soil evenly‚ eliminating any mounds or uneven patches. Check the surface with a level to confirm consistency. Compact the soil gently with a hand tamper or lawn roller to prevent settling. Lightly water the soil to reveal any remaining imperfections‚ addressing them promptly. A smooth‚ uniform base is essential for sod to lie flat and root properly. This step guarantees a professional finish‚ minimizing future maintenance and ensuring the lawn looks its best from the start.

Final Grading and Levelling
Final grading ensures the soil is perfectly level‚ typically 1 inch below paved surfaces‚ using tools like strings and boards to achieve a precise grade. Proper techniques guarantee a smooth‚ even surface for sod installation‚ ensuring optimal drainage and a professional finish. This step is crucial for the sod to lie flat and root evenly‚ creating a stable and visually appealing lawn. Attention to detail here ensures long-term health and aesthetics of the newly installed sod.
Ensuring the Soil is 1 Inch Below Paved Surfaces
Ensuring the soil is 1 inch below paved surfaces guarantees proper drainage and a seamless transition between the lawn and hardscapes. Use a level and measuring tools to verify the grade‚ adjusting the soil as needed to maintain consistency. This step prevents water from pooling near surfaces and ensures the sod lies evenly. Properly graded soil promotes healthy root growth and prevents erosion. Check the soil level against driveways‚ walkways‚ and patios‚ making adjustments to achieve the desired elevation. This precise grading ensures a professional finish and long-term stability for the sod installation.
Using Strings and Boards to Achieve a Perfect Grade
To achieve a perfect grade‚ use stakes and string to create a guide for leveling. Drive stakes into the ground at key points and stretch taught string between them to mark the desired soil level. This visual guide helps ensure consistency across the area. Use a long‚ straight board or a 2×4 to smooth the soil‚ working it back and forth to distribute material evenly. Water the soil lightly to help it settle before final adjustments; This method ensures precision and prevents unevenness‚ creating a uniform base for sod installation. It’s a simple yet effective technique for achieving professional-grade results. Proper leveling is essential for sod health and appearance.

Installing the Sod
Lay sod pieces tightly together‚ aligning edges carefully. Gently press each piece into place‚ ensuring full contact with the soil. Water thoroughly after installation to promote root establishment and a lush‚ even appearance.
Aligning Sod Pieces and Addressing Footprints or Gaps
Align sod pieces neatly‚ ensuring edges fit snugly without overlapping. Use a level to verify even placement. For footprints or gaps‚ gently lift the sod and fill the area with soil‚ pressing firmly to secure. Water the sod thoroughly after installation to settle the soil and eliminate air pockets. Regular watering in the first few weeks helps establish root growth. Monitor the sod for any unevenness or settling‚ making adjustments as needed to maintain a smooth‚ uniform appearance. Proper alignment and gap management are crucial for a healthy‚ visually appealing lawn. Immediate attention to these details ensures long-term sod success.
Maintenance After Sod Installation
Water the sod regularly to maintain soil moisture‚ especially in the first few weeks. Monitor for proper root growth and adjust watering as the sod establishes itself.
Watering and Monitoring the Soil Moisture Levels
Proper watering is critical after sod installation to ensure healthy root growth. Water the sod thoroughly immediately after installation and keep the soil consistently moist during the first few weeks. Use a soil probe to check moisture levels‚ ensuring the soil isn’t overly saturated‚ which can lead to root rot. Avoid frequent shallow watering; instead‚ water deeply but infrequently to encourage deep root development. Monitor weather conditions and adjust watering schedules accordingly. Overwatering can cause water pooling and harm the sod. Maintain even moisture until the sod is fully established and rooted‚ typically within 4-6 weeks. Proper hydration ensures a lush‚ durable lawn.