Ryobi Router Table Manual: A Comprehensive Guide
This manual provides essential guidance for the Ryobi router table, ensuring safe and effective operation. It details assembly, adjustments, and maintenance,
covering models like A25RT02, RT101, and RT401W. Understanding this guide is crucial for years of reliable performance.
The Ryobi router table represents a versatile addition to any woodworking shop, offering enhanced precision and control for a wide array of routing tasks. Unlike handheld routers, a router table securely mounts the router beneath a stable surface, allowing for consistent and repeatable cuts. This is particularly beneficial for edge profiling, dadoes, rabbets, and intricate joinery.
Ryobi offers several router table models, including the A25RT02, RT101, and RT401W, each designed to accommodate specific Ryobi routers. It’s crucial to understand that these tables are specifically engineered for compatibility with Ryobi routers only; using other brands may compromise safety and performance.
This guide serves as a comprehensive resource for setting up, operating, and maintaining your Ryobi router table. Prior to use, carefully review the safety precautions and warnings outlined in the operator’s manual. Proper understanding of the table’s features and functions will unlock its full potential, enabling you to achieve professional-quality results with confidence. Remember, the RT101 is a router table, not a rotary tool.
Understanding the A25RT02 Model
The Ryobi A25RT02 router table is a popular choice for hobbyists and DIY enthusiasts, offering a balance of affordability and functionality. This model is designed for stationary routing operations, providing a stable platform for precise cuts. It features a durable construction and a user-friendly design, making it suitable for both beginners and experienced woodworkers.
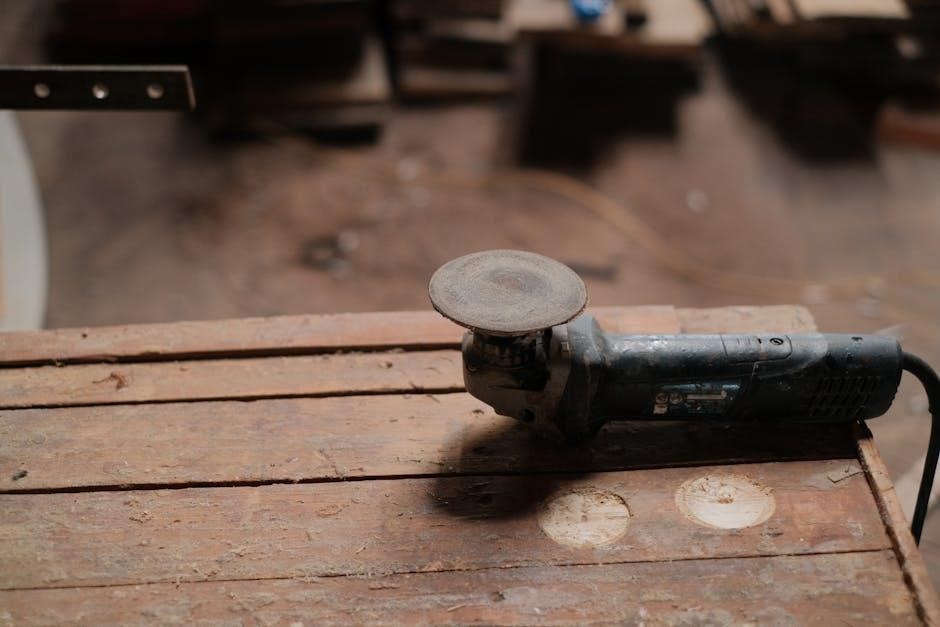
Key components of the A25RT02 include a sturdy table surface, a fence system for guiding the workpiece, and mounting hardware for securing a compatible Ryobi router. The table’s design allows for easy bit changes and adjustments, enhancing workflow efficiency. It’s important to note that the A25RT02, like other Ryobi router tables, requires careful assembly and adjustment according to the operator’s manual.
The A25RT02 is engineered for dependability and operator safety, but proper care and adherence to safety guidelines are essential. Always ensure the router is securely mounted and the fence is properly aligned before operation. Refer to the manual for detailed instructions on installation, operation, and maintenance to maximize the table’s performance and longevity.
Safety Precautions & Warnings
Prior to operating the Ryobi router table, thoroughly read and understand the operator’s manual. Ignoring warnings can lead to serious injury. Always disconnect the router from the power source before making adjustments, changing bits, or performing maintenance. Wear appropriate safety gear, including safety glasses, hearing protection, and a dust mask, to protect against flying debris and loud noise.
Never reach over or around the rotating router bit. Maintain a firm grip on the workpiece and use push sticks or featherboards to guide it safely. Ensure the fence is securely locked in position before starting the router. Avoid loose clothing or jewelry that could become entangled in the machinery. Inspect the router and table for any damage before each use, and do not operate if any parts are missing or damaged.
Use only Ryobi routers with this table, as compatibility with other brands is not guaranteed and could pose a safety hazard. Be mindful of the router’s power cord and keep it away from the rotating bit. Always supervise the router table when in use, and never leave it unattended. Following these precautions will help ensure a safe and productive woodworking experience.
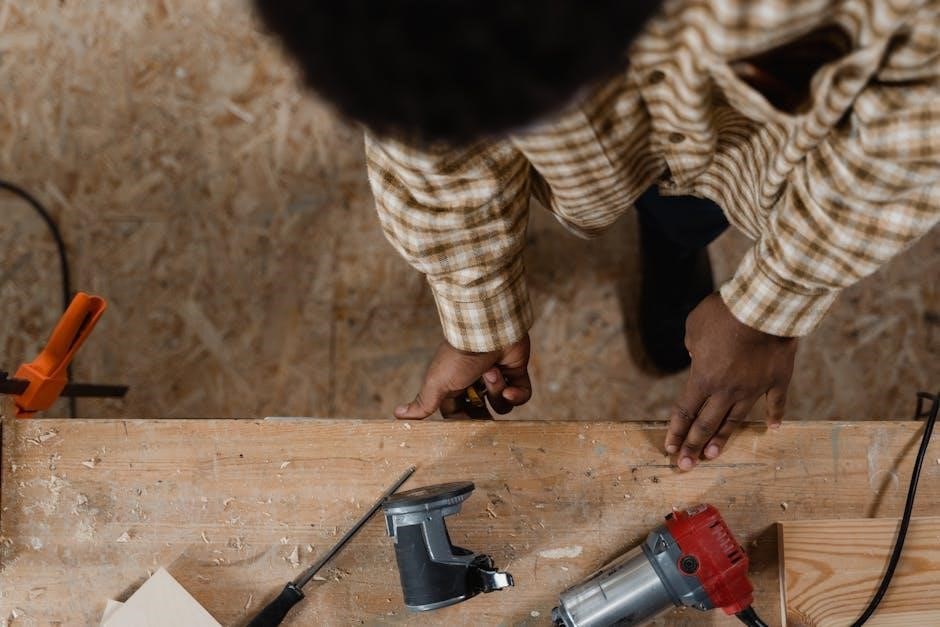
Unboxing and Parts List
Upon receiving your Ryobi router table (model A25RT02 or similar), carefully inspect the packaging for any signs of damage during shipping. Once opened, verify that all components listed in the parts diagram are present. The standard package typically includes the router table itself, fence assembly, legs, dust collection port, miter slots, and hardware for assembly.
A detailed parts list is included within the operator’s manual, illustrating each component with a corresponding reference number. Carefully compare the contents of your box against this list to ensure nothing is missing. Pay close attention to smaller items like screws, bolts, washers, and adjustment knobs, as these are easily overlooked. If any parts are missing or damaged, contact Ryobi customer support immediately for replacements.
Retain the packaging and manual for future reference, especially regarding warranty information. Before proceeding with assembly, familiarize yourself with each part and its intended function. Proper inventory and identification of components will streamline the setup process and prevent frustration. A complete parts list is essential for a successful assembly.
Assembly Instructions ― Step-by-Step
Begin by attaching the legs to the router table base using the provided bolts and washers, ensuring they are securely tightened. Next, install the fence assembly, aligning it with the pre-drilled holes and fastening it with the appropriate hardware. Refer to the detailed diagrams in the operator’s manual for precise placement and orientation.
Carefully attach the dust collection port to the designated opening on the table, ensuring a snug fit to maximize dust extraction efficiency. Insert the miter slots into their respective grooves, verifying they slide smoothly and provide accurate angles. Double-check all connections to confirm stability and prevent wobbling during operation.
Throughout the assembly process, avoid over-tightening screws, as this could damage the components. Take your time and follow each step meticulously. Once assembled, inspect the table for any loose parts or misalignments. A properly assembled table is crucial for safe and accurate routing. The manual provides clear visual guidance for each stage of assembly.
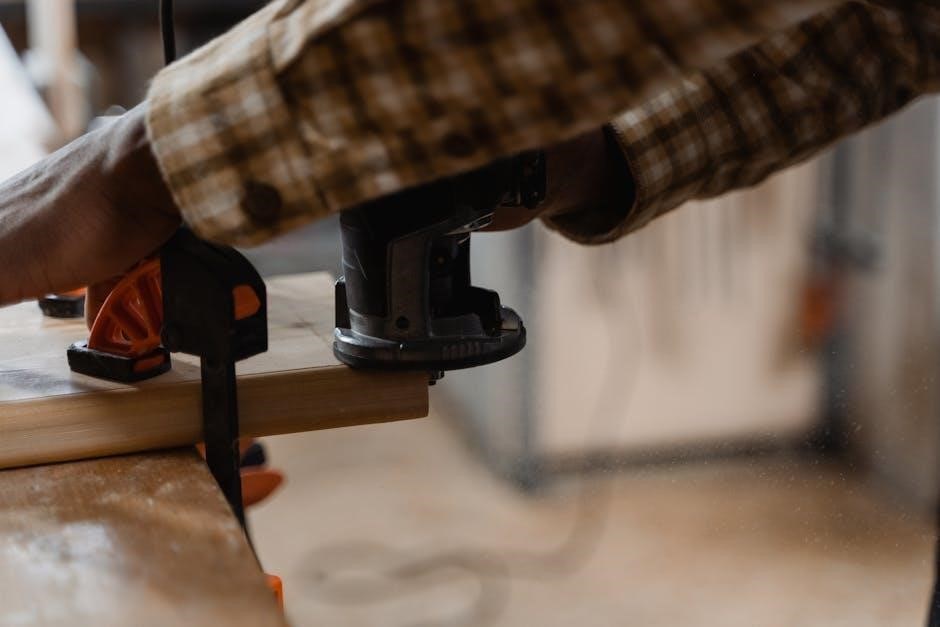
Attaching the Router to the Table (Compatibility)
The Ryobi router table is specifically designed for compatibility with Ryobi routers only. Attempting to use routers from other brands may result in improper fitment, reduced stability, and potential safety hazards. Ensure your Ryobi router’s base is clean and free of debris before attachment.
Locate the mounting plate on the router table and align it with the corresponding mounting holes on the router base. Secure the router to the plate using the provided bolts and washers, tightening them firmly but not excessively. Refer to the operator’s manual for detailed illustrations of the attachment process.
Verify that the router is securely fastened and does not wobble or shift during operation. A stable connection is essential for accurate routing and operator safety. The router should sit flush within the table opening, allowing for smooth bit projection. Always disconnect the router from the power source before making any adjustments or attachments.
Router Compatibility: Ryobi Routers Only
Ryobi explicitly states that the router table – models A25RT02, RT101, and RT401W – is engineered for use exclusively with Ryobi routers. Utilizing routers from other manufacturers is strongly discouraged and voids any warranty claims related to compatibility issues. This restriction ensures optimal performance, safety, and a secure fit within the table’s mounting system.
Attempting to adapt non-Ryobi routers may require modifications to the table or the router itself, potentially compromising structural integrity. The mounting plate and hardware are specifically designed for Ryobi router base configurations. Different router base shapes or mounting hole patterns will not align correctly.

Prior to purchasing a router table, confirm you own a compatible Ryobi router. The operator’s manual clearly emphasizes this requirement. Using an incompatible router could lead to inaccurate cuts, increased vibration, and a heightened risk of injury. Always prioritize safety and adhere to the manufacturer’s recommendations.
Fence Adjustment and Alignment
Precise fence adjustment is paramount for accurate routing. The Ryobi router table’s fence allows for both parallel and angled cuts. Begin by loosening the fence locking mechanisms – typically knobs or levers – to enable movement. Ensure the fence slides smoothly along the table’s rails before tightening.

For parallel cuts, use a measuring tape to set the desired distance between the fence and the router bit. Double-check this measurement at both ends of the fence to confirm it remains parallel. For angled cuts, utilize a protractor or angle finder to set the fence to the correct degree.
Regularly verify fence alignment. Even slight misalignments can result in inaccurate cuts. A test piece and a square can help identify any deviations. Tighten the locking mechanisms firmly after each adjustment to prevent movement during operation. Proper alignment is crucial for achieving professional-quality results.
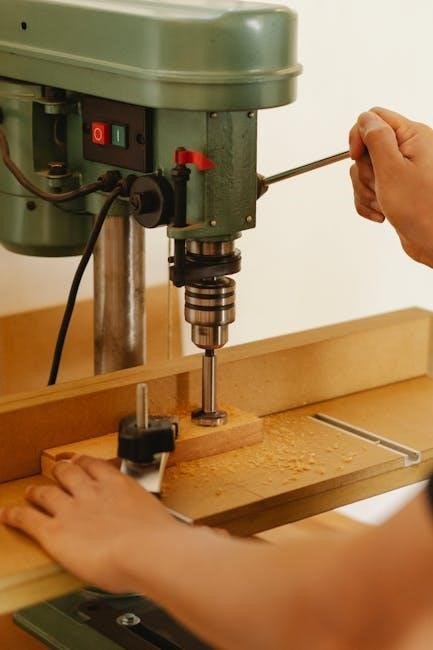
Bit Changing Procedures
Always disconnect the router from the power source before attempting to change bits. This is a critical safety precaution. Locate the collet on the router – this secures the bit. Use the appropriate wrenches (typically included with the router) to loosen the collet nut. Never use excessive force, as this can damage the collet.
Carefully remove the old bit and inspect the collet for debris. Clean the collet and the router shaft if necessary. Insert the new bit fully into the collet, ensuring it’s seated correctly. Tighten the collet nut securely with the wrenches, again avoiding excessive force.
Double-check that the bit is firmly locked in place before reconnecting the router to power. A loose bit can be dangerous. Refer to your router’s operator’s manual for specific instructions related to your model. Following these procedures ensures safe and efficient bit changes.
Dust Collection System Setup
Effective dust collection is vital for a clean and safe workspace when using your Ryobi router table. Locate the dust port on the router table – typically a 2.5-inch opening. Connect a dust collector hose to this port, ensuring a secure and airtight fit. A shop vacuum or dedicated dust collector can be used.
Ensure the dust collector is properly grounded to prevent static electricity buildup. Check the hose connections frequently for leaks, as even small gaps can reduce collection efficiency. Consider using a dust separator before the dust collector to prevent clogging and extend filter life.
Regularly empty the dust collector or vacuum bag to maintain optimal suction. Refer to your dust collector’s manual for specific operating instructions. Proper dust collection minimizes airborne particles, improving visibility and protecting your respiratory health.
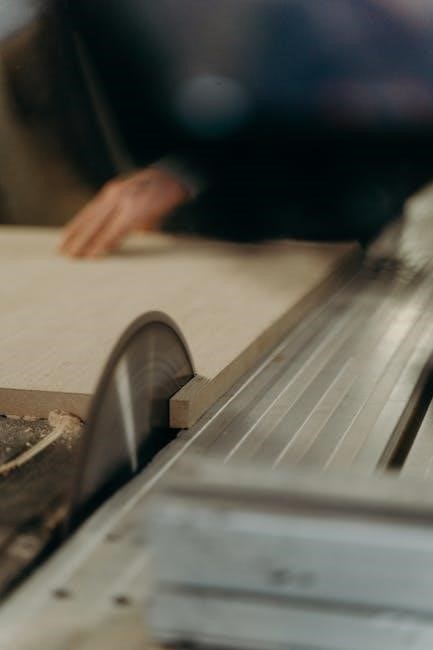
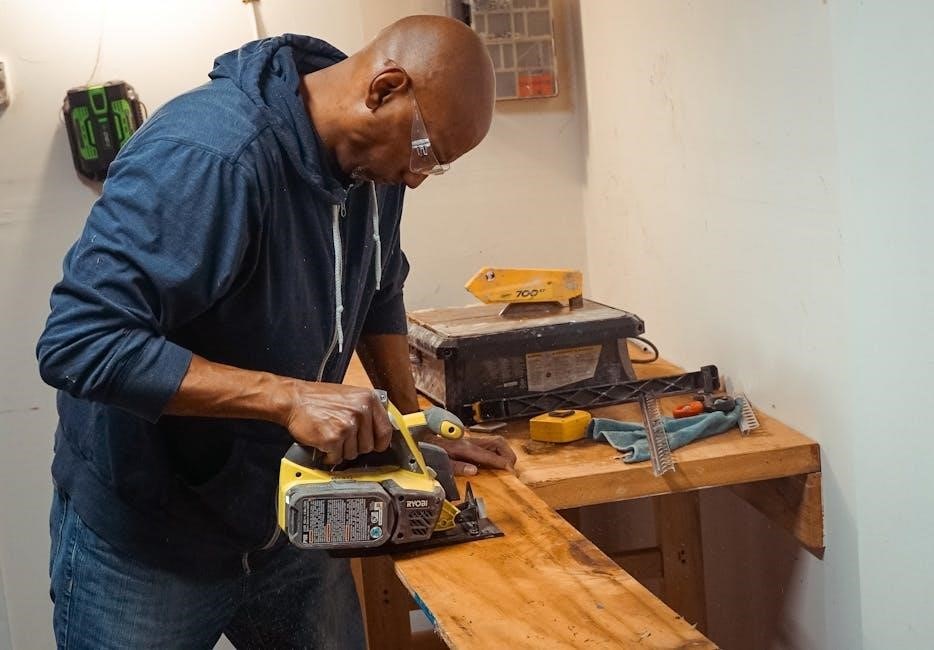
Using the Router Table: Basic Operations
Before starting, always ensure the router is securely mounted to the table and the power is off. Select the appropriate router bit for your desired cut and install it according to the router’s manual. Adjust the bit height using the table’s adjustment mechanism, ensuring it’s at the correct level for your workpiece.
Always use push blocks or featherboards to safely guide the workpiece across the table. Feed the wood into the bit smoothly and consistently, avoiding sudden movements. Never reach over the spinning bit. Maintain a firm grip on the workpiece and keep your hands a safe distance from the cutting area.
For repetitive cuts, utilize the fence to ensure consistent results. Practice on scrap wood before working on your final project. Remember to always wear safety glasses and a dust mask during operation.
Advanced Techniques & Jigs
Beyond basic routing, the Ryobi table excels with specialized jigs. Consider creating a tapering jig for angled cuts or a circle-cutting jig for precise curves. These jigs enhance accuracy and repeatability, expanding your project possibilities.
The Router Raizer RZ100, a related accessory, transforms the router table into a lathe-like setup for carving patterns – ideal for creating decorative elements. Experiment with different bit profiles to achieve unique edge treatments and designs. Featherboards and hold-downs are crucial for securing workpieces during complex operations.
Mastering techniques like rabbeting and dadoing requires precise fence adjustments and multiple passes. Always prioritize safety when using advanced techniques, and remember to consult the router’s manual for bit speed recommendations. Proper dust collection is essential for maintaining a clean and safe working environment.
Maintenance and Cleaning
Regular maintenance ensures your Ryobi router table’s longevity and optimal performance. After each use, thoroughly clean the table surface, removing sawdust and debris with a brush or vacuum. Pay close attention to the fence and miter slots, ensuring they remain free of obstructions for accurate adjustments.
Periodically inspect all fasteners – bolts, screws, and knobs – tightening them as needed. Lubricate moving parts, such as the fence rails and height adjustment mechanisms, with a light machine oil. Check the router mounting plate for any signs of wear or damage.
Dust collection systems require regular emptying and cleaning to maintain efficient operation. Avoid using harsh chemicals or abrasive cleaners on the table surface, as they can damage the finish. Properly storing the table when not in use will protect it from dust and moisture, extending its lifespan.
Troubleshooting Common Issues
If the fence isn’t sliding smoothly, check for debris in the rails and apply a light lubricant. Inaccurate cuts often stem from a misaligned fence; re-align it carefully using a square. Router bit wobble can indicate a loose collet or damaged router mounting plate – tighten or replace as needed.
Excessive vibration may be caused by an unbalanced router bit or a loose router within the table. Ensure the router is securely fastened and the bit is properly balanced. If the dust collection isn’t working effectively, check for clogs in the hose and dust port.
Difficulty changing bits can often be resolved by consulting the router’s operator manual for specific instructions. Always disconnect the power before attempting any repairs or adjustments. If problems persist, refer to the Ryobi support website or contact customer service for assistance.
Understanding the Router Raizer RZ100 (Related Accessory)
The Router Raizer RZ100 is a specialized attachment designed to transform your Ryobi router into a versatile lathe-like tool. It enables carving of rounded or irregular shapes that are difficult to achieve with a standard router table setup. This accessory holds the workpiece securely while the router, guided by a rail, travels along its surface.
Essentially, it expands the capabilities of your Ryobi router beyond traditional edge profiling and joinery; The RZ100 is particularly useful for creating bowls, spheres, and other contoured forms. Installation requires careful adherence to the included instructions, ensuring proper alignment and stability.

The operator’s manual for the RZ100 provides detailed diagrams and safety guidelines. It’s crucial to understand its function and limitations before use. While not directly part of the router table, it complements the system, offering expanded creative possibilities for woodworking projects.
RT101 vs. RT401W: Model Differences
Ryobi offers several router table models, with the RT101 and RT401W being prominent examples. The RT101 is a foundational router table, representing an earlier design focused on core functionality. It’s often described as a basic, yet capable, option for hobbyists and those starting with router table work.
The RT401W, conversely, represents a more advanced iteration. It generally features improvements in design, stability, and adjustability. These enhancements often include a more robust fence system, finer adjustment mechanisms, and potentially a larger table surface. The RT401W is geared towards users demanding greater precision and versatility.
While both models accept Ryobi routers, the RT401W may offer more seamless integration or dedicated mounting points. Consider your project needs and skill level when choosing between these models. The operator’s manual for each model details specific features and capabilities, aiding in informed decision-making.
Locating the Operator’s Manual Online
Accessing the Ryobi router table operator’s manual online is straightforward, offering a convenient alternative to the physical copy. Ryobi’s official website is the primary resource, typically hosting manuals in PDF format. Navigate to the “Support” or “Manuals” section of the Ryobi website and search using the model number – A25RT02, RT101, or RT401W – to pinpoint the correct document.
Alternatively, several third-party websites specialize in archiving and distributing instruction manuals. These sites can be valuable if the Ryobi website is temporarily unavailable or if you require an older version of the manual. However, always verify the source’s credibility to ensure the manual’s accuracy and completeness.
A quick internet search using terms like “Ryobi A25RT02 manual PDF” will also yield relevant results. Downloading the manual allows for easy reference during assembly, operation, and maintenance, ensuring safe and effective use of your router table. Remember to save the PDF for future access.
Warranty Information and Support
Ryobi stands behind its router tables with a comprehensive warranty, typically covering manufacturing defects and component failures for a specified period. The warranty duration varies by region and model (A25RT02, RT101, RT401W), so reviewing the documentation included with your purchase is crucial. Keep your proof of purchase – the receipt – as it’s required for any warranty claim.
For warranty claims or technical support, Ryobi offers multiple channels. Their official website provides a “Contact Us” section with options for phone support, email inquiries, and live chat. Ryobi’s customer service representatives can assist with troubleshooting, parts replacement, and warranty processing.
Additionally, Ryobi’s online support resources include FAQs, how-to videos, and downloadable manuals. These resources can often resolve common issues without requiring direct contact with support. Registering your router table online also streamlines the warranty process and provides access to exclusive updates and promotions.
Frequently Asked Questions (FAQ)
Q: Can I use routers other than Ryobi with this table? A: No, the Ryobi router table (models A25RT02, RT101, RT401W) is designed specifically for use with Ryobi routers to ensure compatibility and safety.
Q: Where can I find a digital copy of the operator’s manual? A: The manual is available for download on Ryobi’s official website, typically within the support section for your specific router table model. Searching by model number is recommended.

Q: What does the Router Raizer RZ100 do? A: The RZ100 is an accessory that transforms your router into a lathe-like tool for carving patterns, utilizing a guide rail for precise control.
Q: How do I adjust the fence for accurate cuts? A: The fence adjustment involves loosening the locking mechanisms, aligning it to the desired position, and securely tightening the locks. Refer to the manual for detailed instructions.
Q: What is the difference between RT101 and RT401W? A: The RT401W generally offers enhanced features and a more robust construction compared to the RT101.